


Colour Circles - Step by step
Remedying an anomaly between the mixed colour and the car colour step by step:
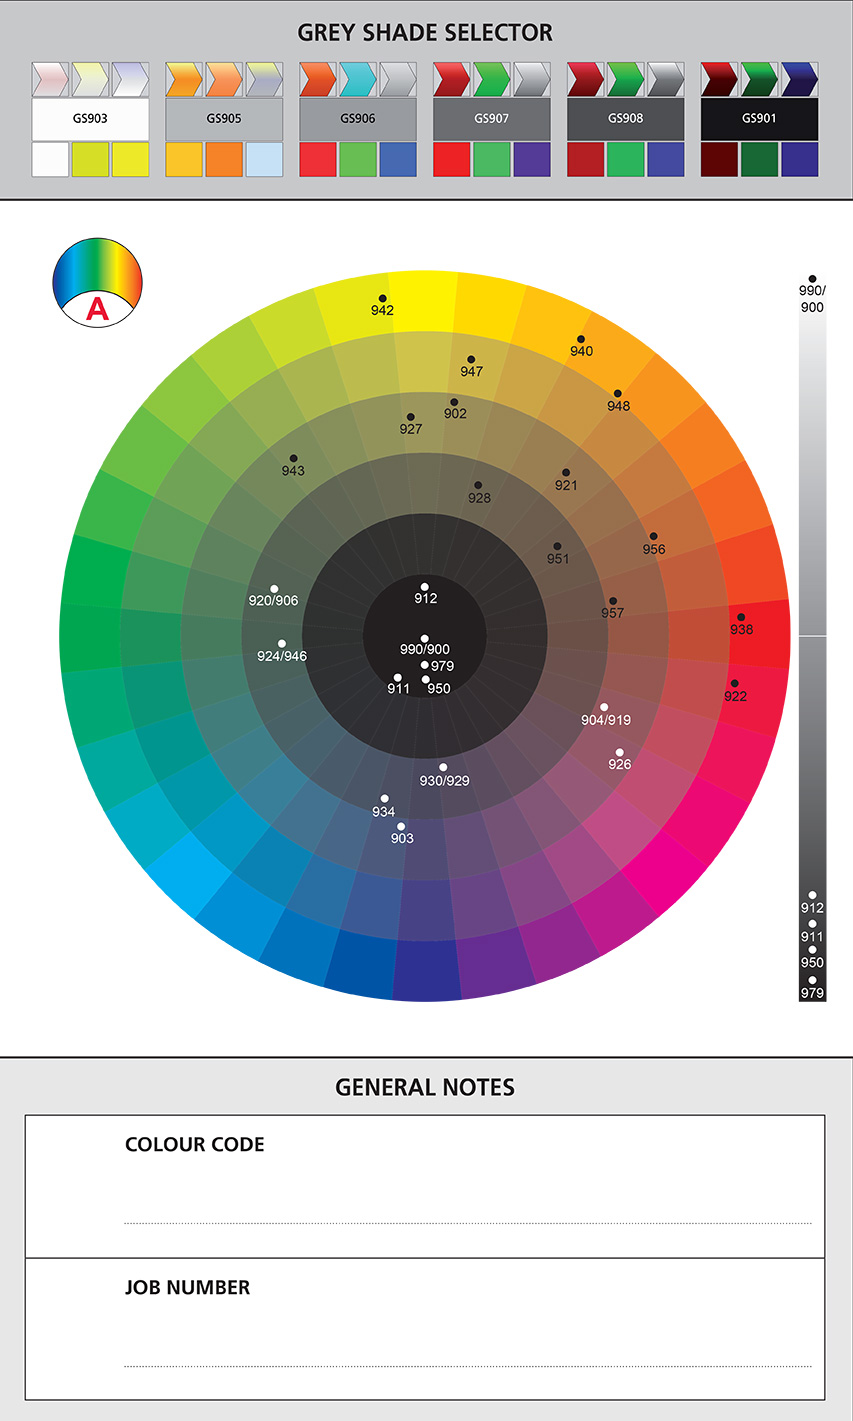
- Select circle A for dark unicolours with less than 10% white
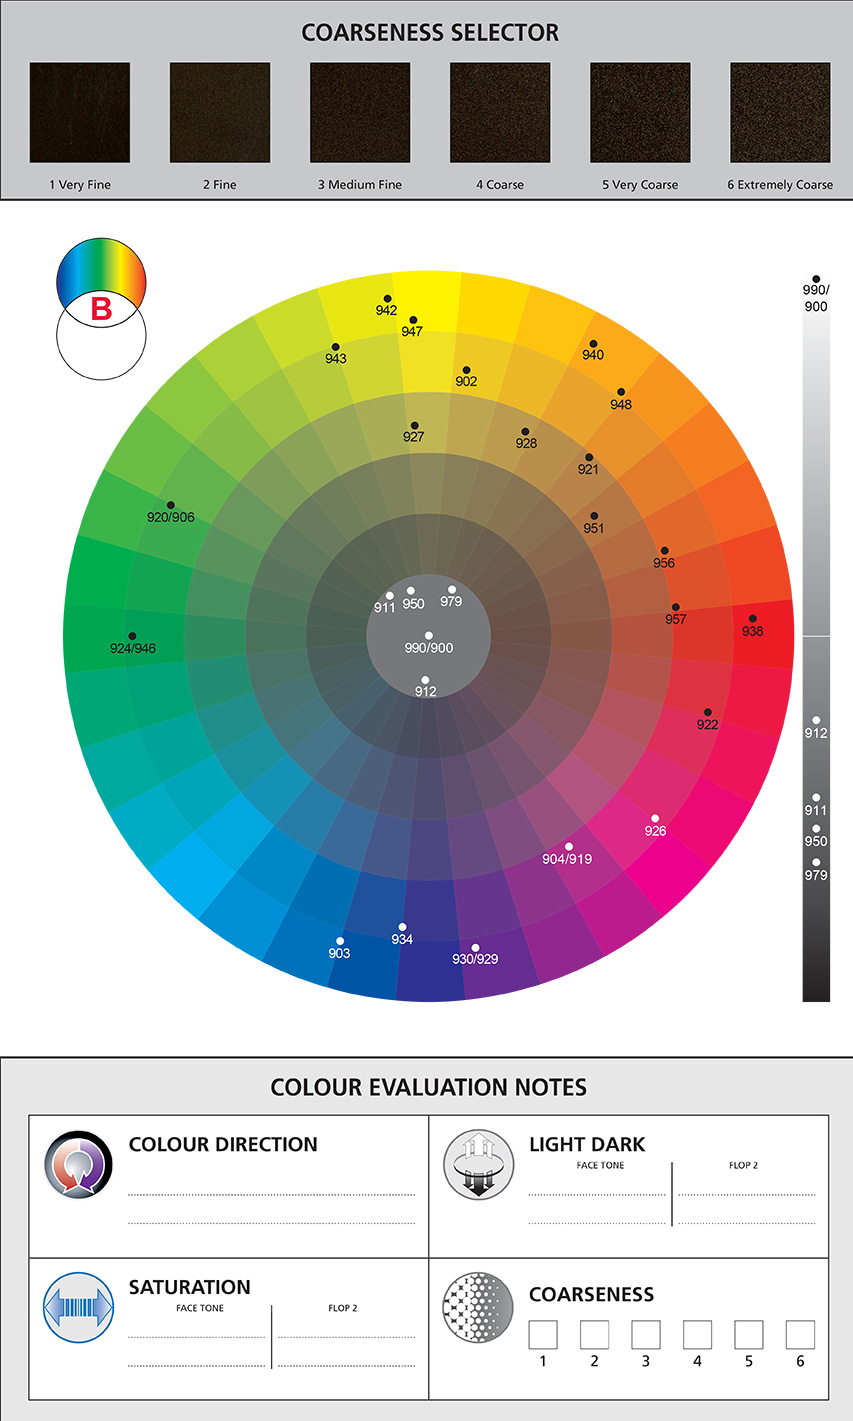
- Select circle B for unicolours with more than 10% white
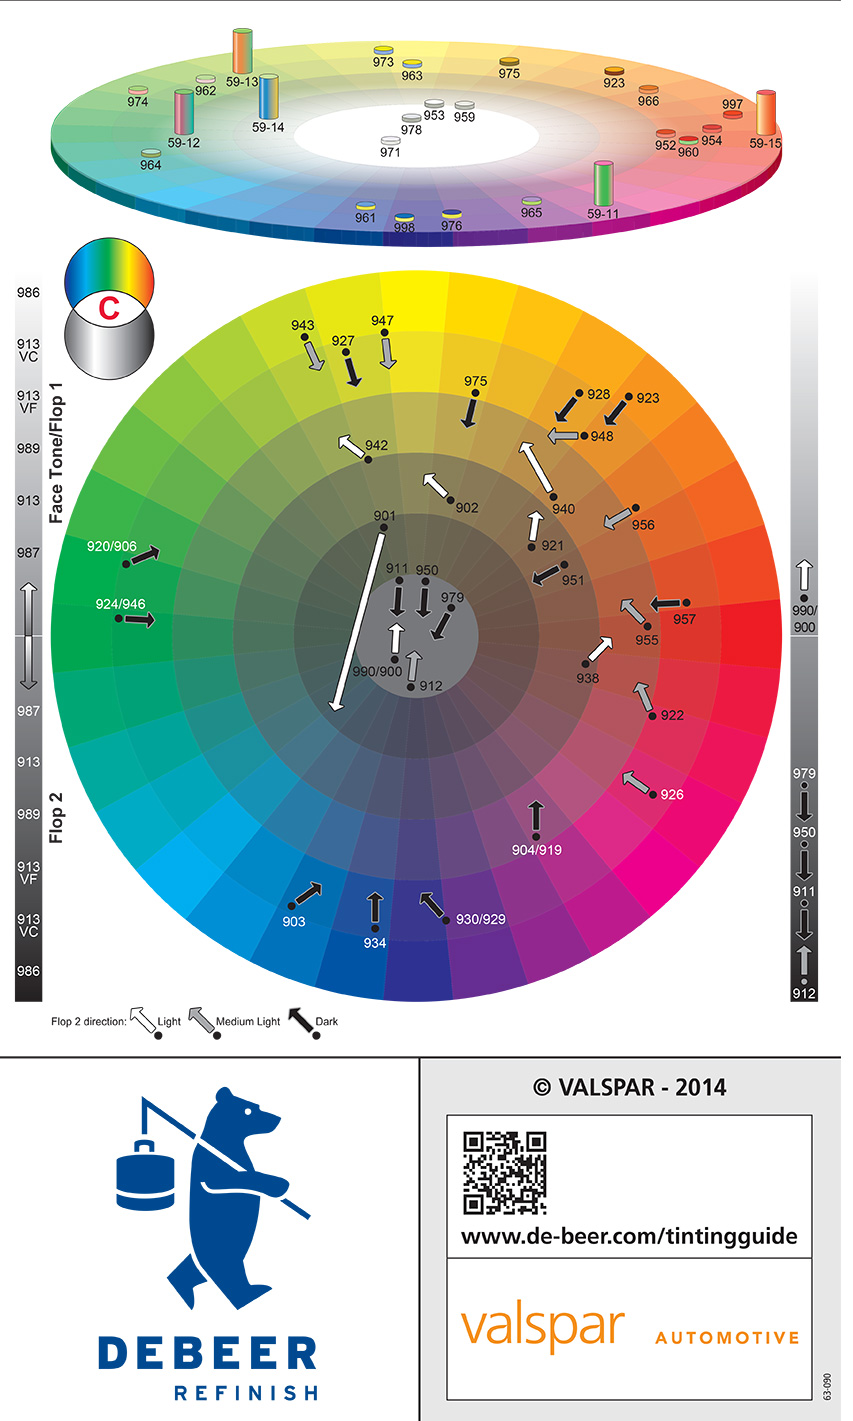
- Select circle C for effect colours
Proceed as follows:
- The mixing colours from the colour formula are linked to one another on the circle. A reference point is placed in this colour area.
- A reference point is also placed on the light/dark contrast bar.
- The colour is then evaluated in comparison with the car colour.
- If the car colour shows a difference in terms of colour direction, this difference will be indicated on the circle by way of an arrow.
- If the car colour shows a difference in terms of saturation (cleaner or dirtier), this too will be indicated by way of an arrow.
- Once the colour has been fully evaluated, the arrows will point in a certain direction, making clear which mixing colour(s) should be used to adjust the colour formula.
- If the colour anomaly pertains to a light/dark contrast, then the arrow on the bar will be pointing upwards or downwards and an indication will be given as to which black or white mixing colour should be used.
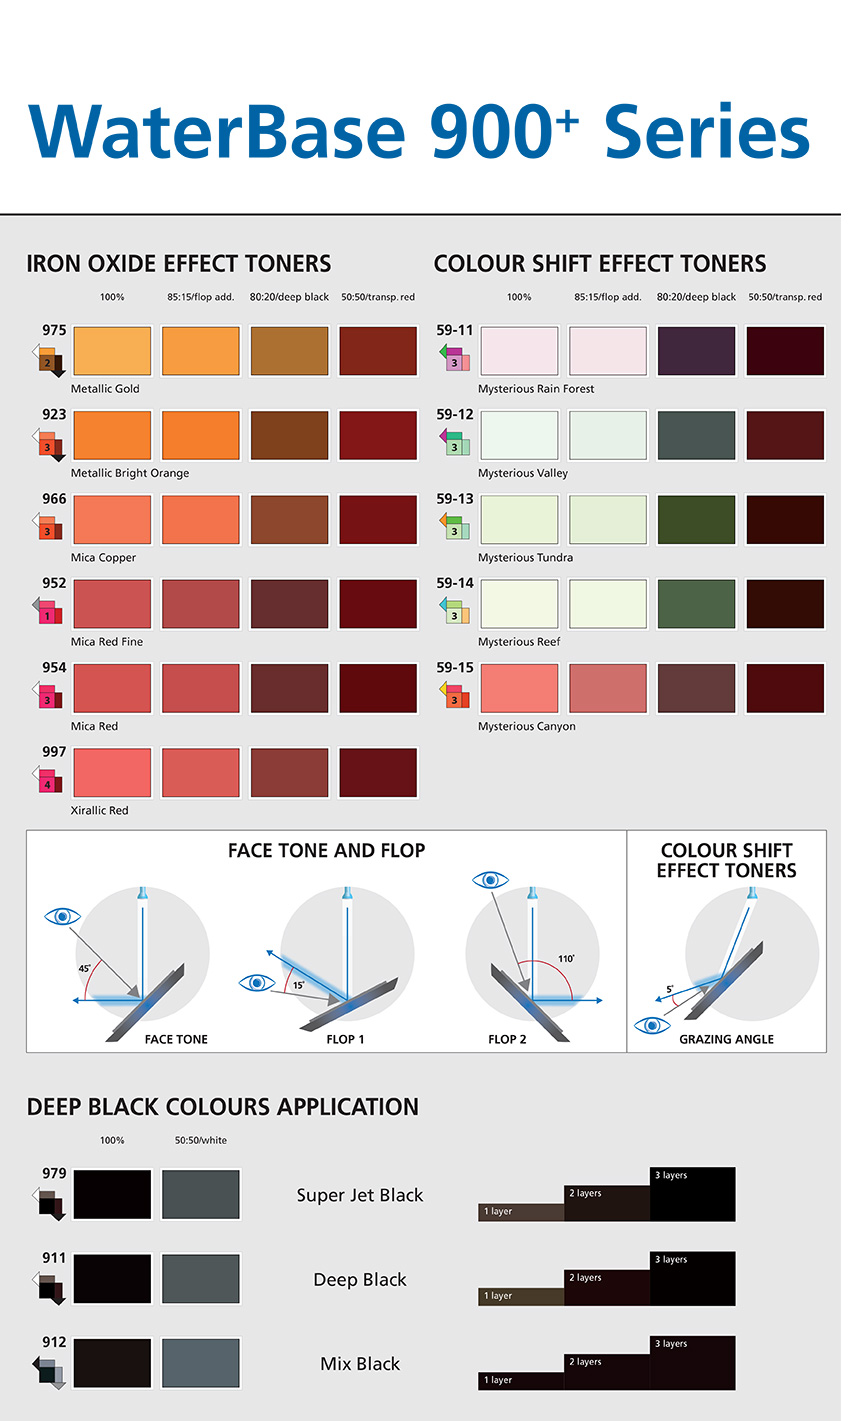
- If it pertains to an effect colour, then the flop is also evaluated. The C circle also indicates the colour flop directions.
- Multi-effect toners are shown on the tilted circle.
- The left-hand bar features the metallics for adjustments in terms of flop 1, flop 2 or face tone.
- The right-hand bar features white and black for the light and dark values.